
The Optimal, Performance-Centric Method of Installing Windows on virt-manager/QEMU/KVM
This installation method focuses on optimizing Windows installation in terms of responsiveness and performance on QEMU/KVM via the front-end GUI called virt-manager.

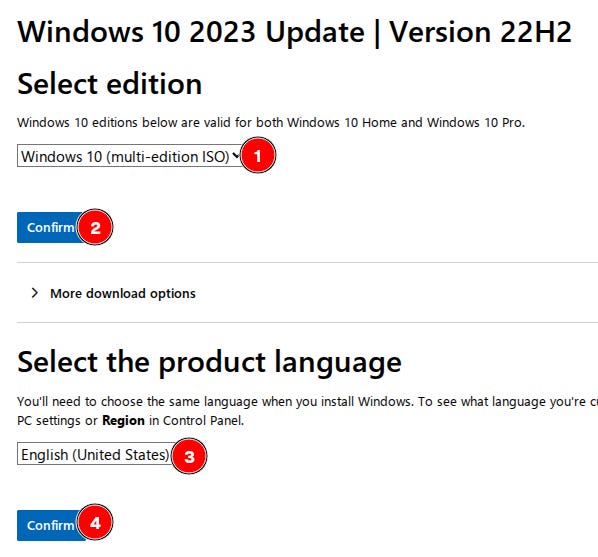
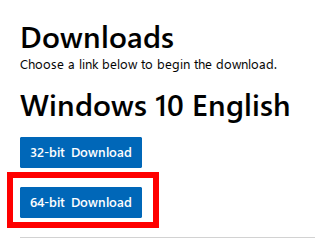
Download the Windows 10 ISO from Microsoft.com here, select Windows 10 (multi-edition ISO) and your preferred language. Choose 64-bit and wait for the download to finish.
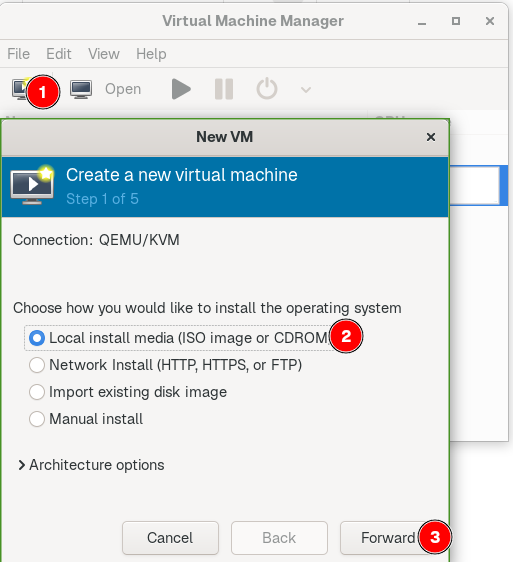
The reason for preferring Windows 10 is that the majority of software (including video games) perform better in Windows 10 than 11. Launch virt-manager, create a new virtual machine, choose Local install media (ISO…, and click Forward.


Browse to the directory where the Windows 10 ISO was saved and select it, uncheck Automatically detect … , select Microsoft Windows 10 and click Forward.

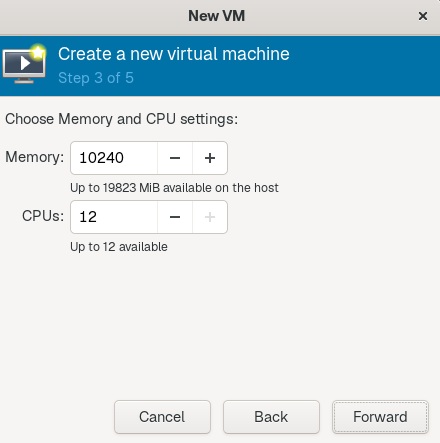
Configure your preferred RAM capacity and CPU core count and click Forward. Set your storage capacity and click Forward.

Mark Customize configuration before install and click Finish.

Overview, select Q35, UEFI x86_64:…edk2-x86_64-code.fd, and Apply.
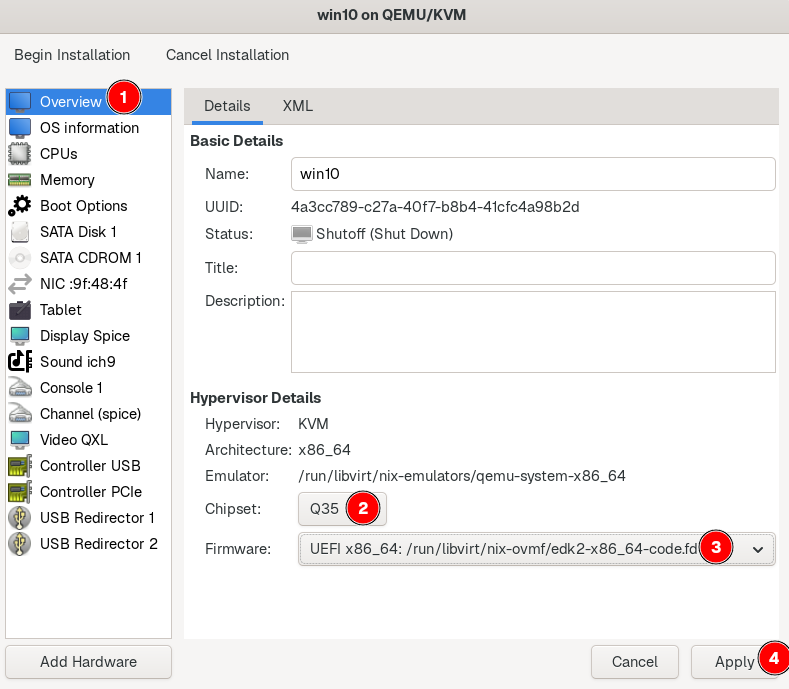
Q35 uses a modern PCIe virtual hardware layout, without the limitations of the legacy i440FX chipset. It offers better device compatibility, pass-through, and stability. UEFI provides faster initialization than legacy BIOS. To reduce complexity that might lead to more problems, we choose edk2-x86_64-code.fd, which disables emulating the Secure Boot firmware. Launch a terminal in your Linux host, execute
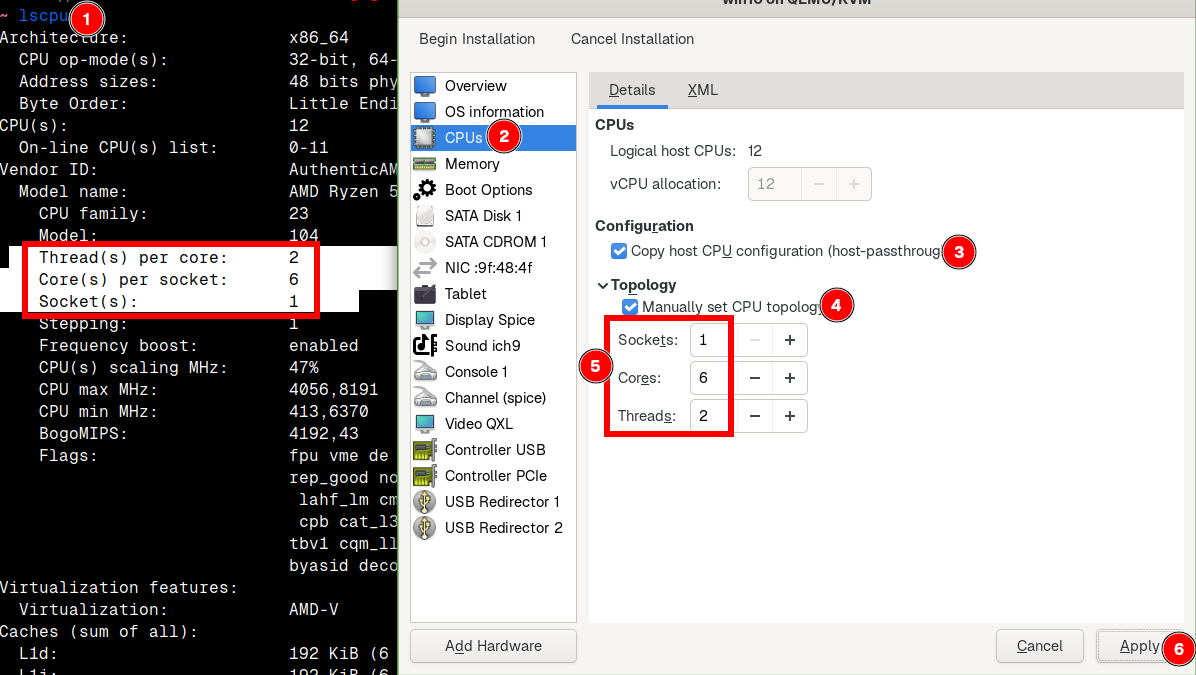
lscpuand match the Threads, Cores and Sockets in virt-manager > CPUs. Check Copy host CPU configuration (host-passthrough). Click Apply.
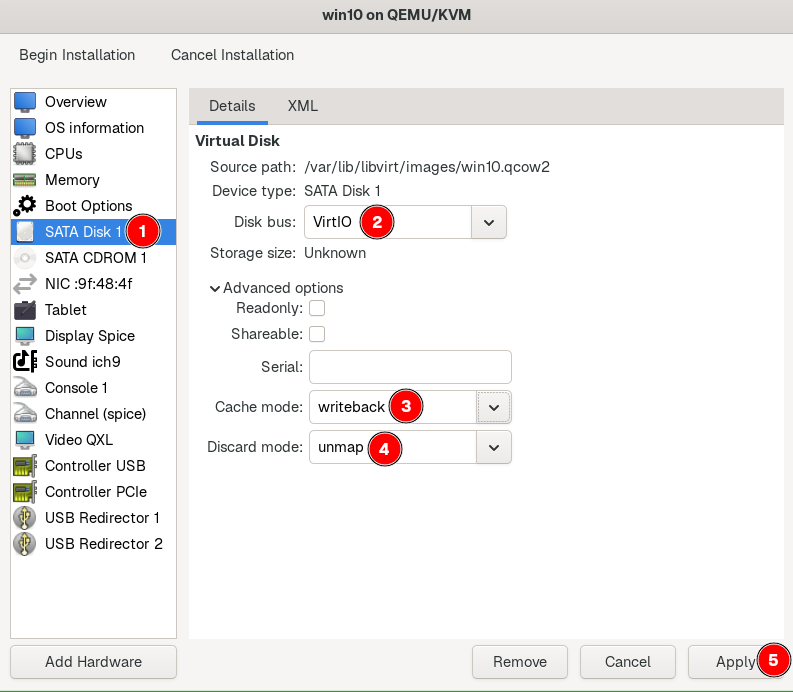
Host-passthrough exposes your CPU’s exact description directly to the guest, allowing the VM to run much closer to native performance. Manually set CPU topology ensures Windows to schedule threads correctly, because Windows sometimes guesses the CPU layout incorrectly, such as treating the VM as a dual-socket system. In SATA Disk 1, select VirtIO, writeback and unmap and click Apply.

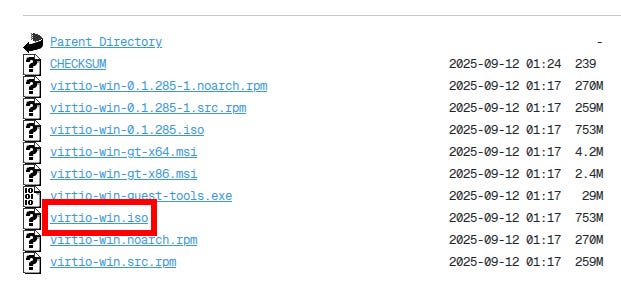
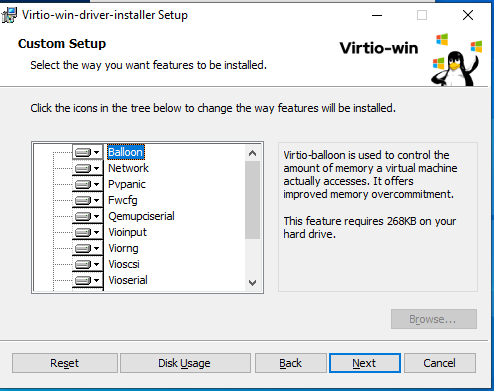
VirtIO disk driver is optimized for virtual machines. It avoids emulation, reduces latency, increases throughput, and uses fewer CPU cycles. Setting writeback to unmap enables TRIM that enables Windows to signal the host which blocks are no longer in use, which prevents qcow2 images from expanding unnecessarily, improves long-term storage performance, and allows SSDs to maintain their write speed. Go to the VirtIO Download page and download virtio-win.iso. To mount that ISO, go to Add Hardware > Storage > Select or create custom… > Manage… and select the virtio-win-0…iso from the directory where the ISO was saved. Change Device type to CDROM device and Finish.

The VirtIO ISO contains all the necessary drivers for Windows to detect the virtualized hardware. This will be demonstrated later on the Windows installation part. 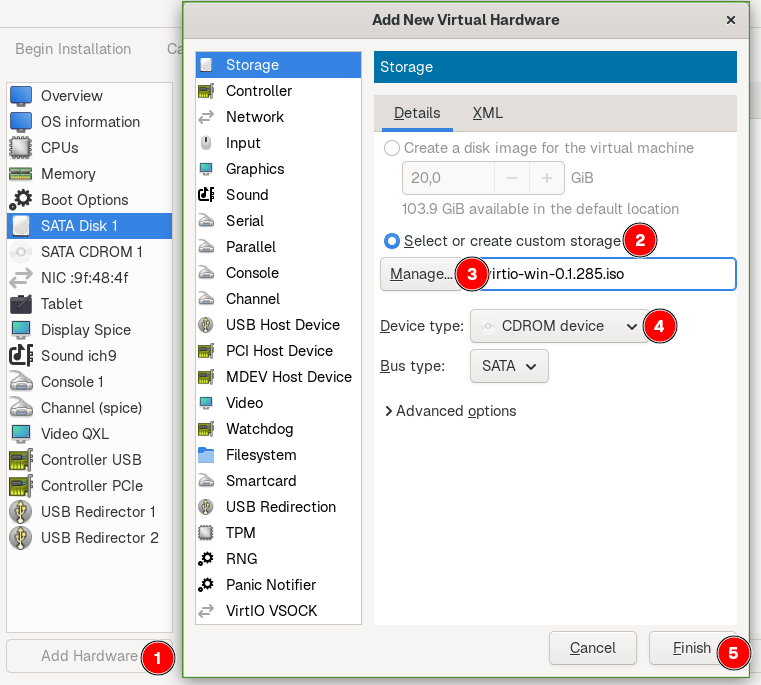
Go to NIC :…, select virtio and Apply.
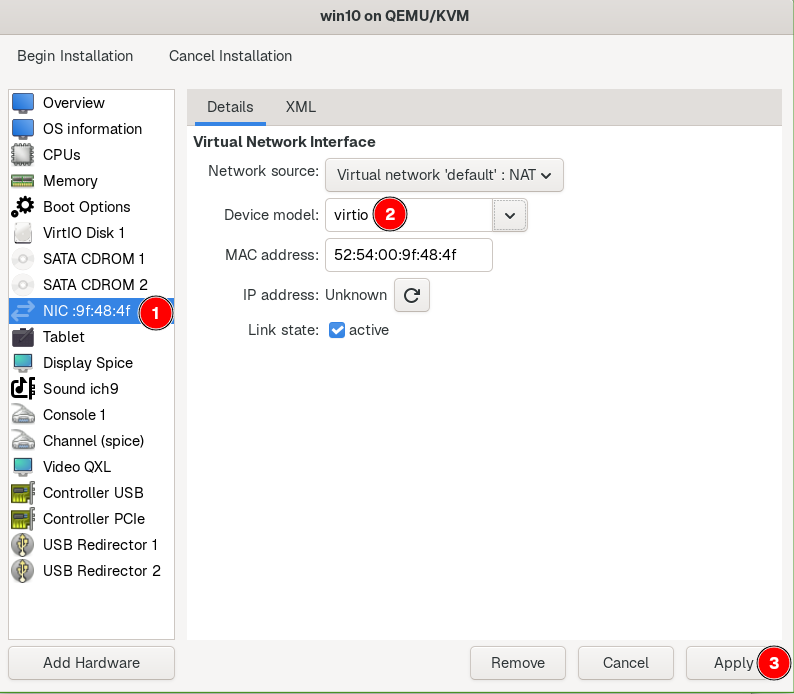
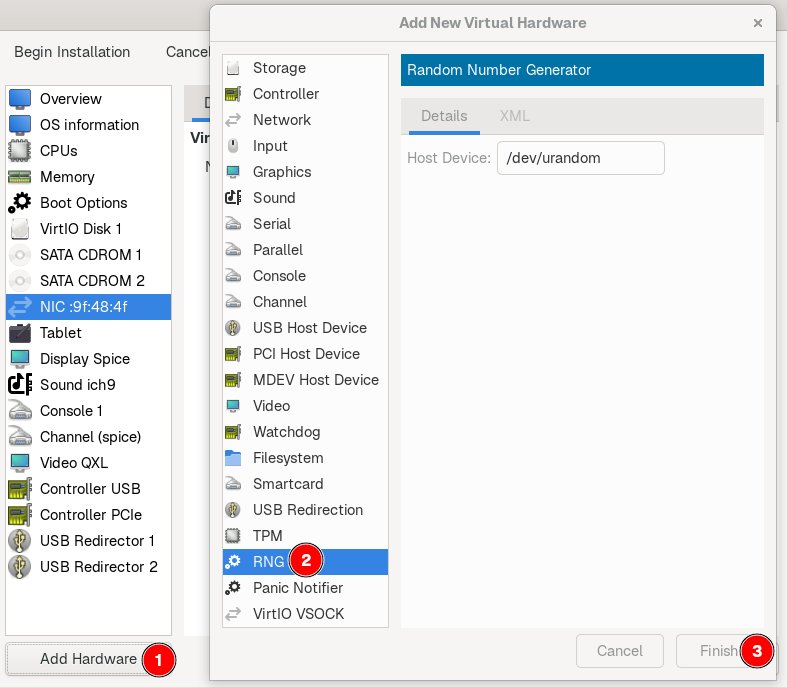
VirtIO network driver is optimized for virtual machines. It improves throughput, reduces latency, and makes the guest machine more efficient in accessing the host network. Add Hardware > RNG > Finish

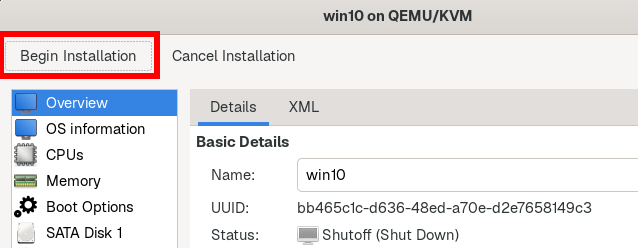
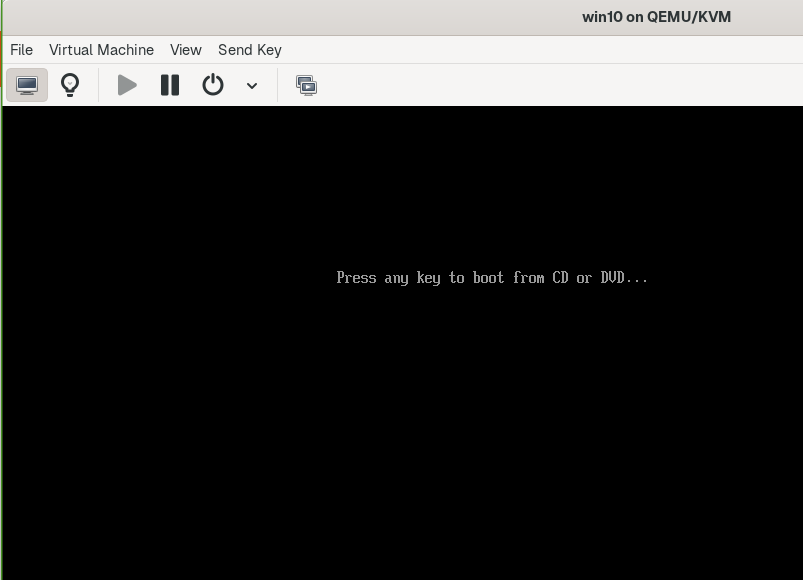
Random Number Generator (RNG) provides entropy to the guest, beneficial for cryptographic operations such as TLS, SSH, VPN, etc. RNG provides entropy from the host into the guest, which reduces delays in workloads that depend on high-quality randomness. Click Begin Installation on the top left and press any key once you see the “…boot from CD or DVD …” prompt.


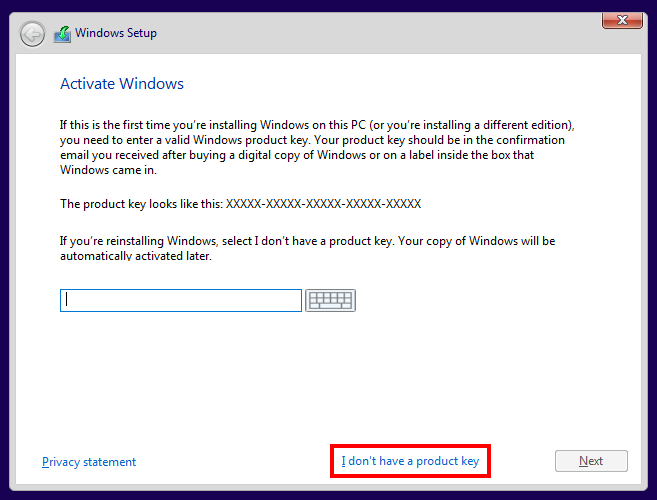
On Windows Setup, select your preferred language and click Next, Install Now, I don’t have a product key.


Still on Windows Setup, select Windows 10 Home N and click Next.

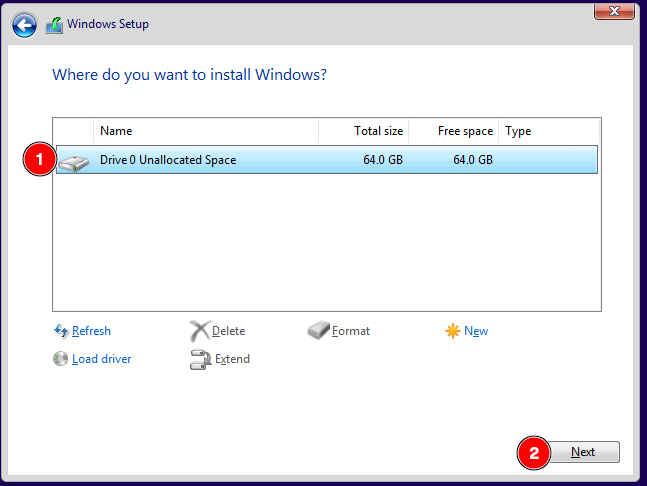
Accept the terms and click Next. Click Custom: Install Windows … and click Next.


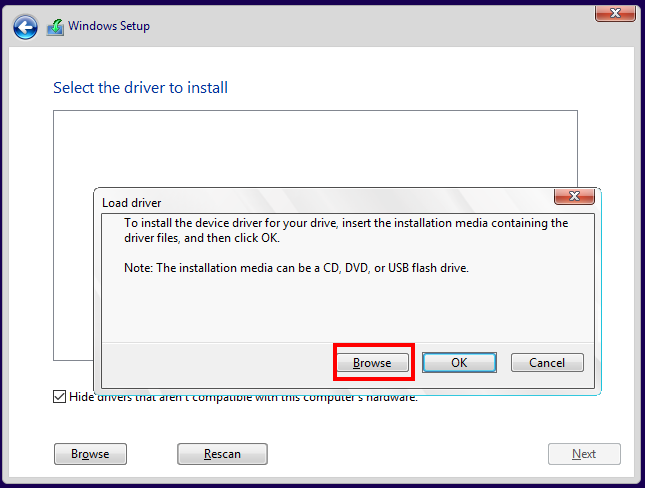
Select Load Driver > Browse.

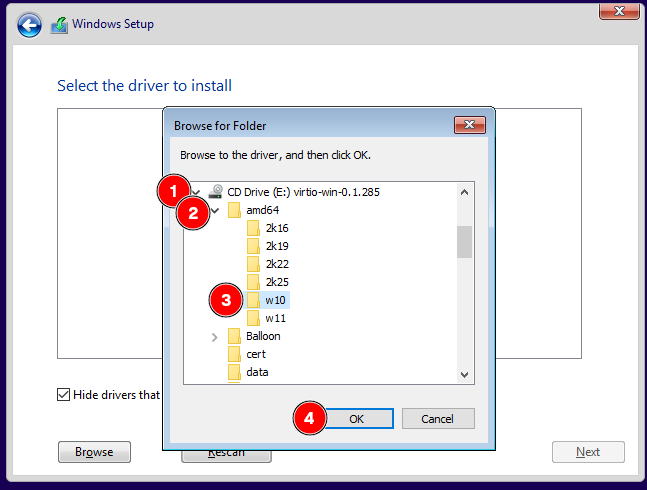
Expand CD Drive (… virtio-win-0… and amd64. Select w10 and click OK.
Select Red Hat VirtIO SCSI … and click Next.

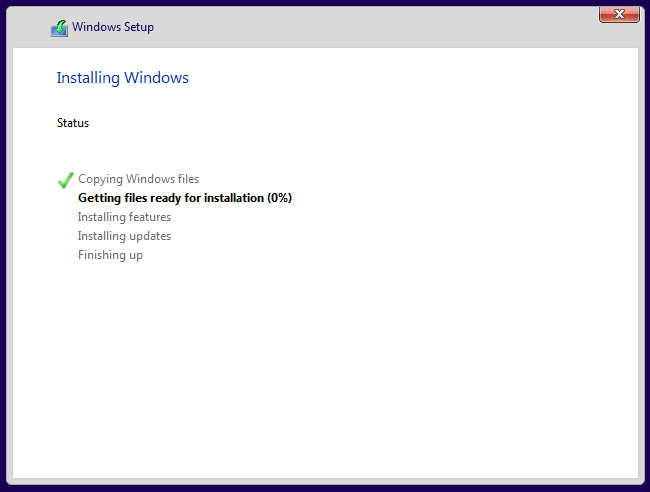
Select the drive and click Next. Wait for the installation to restart your VM.
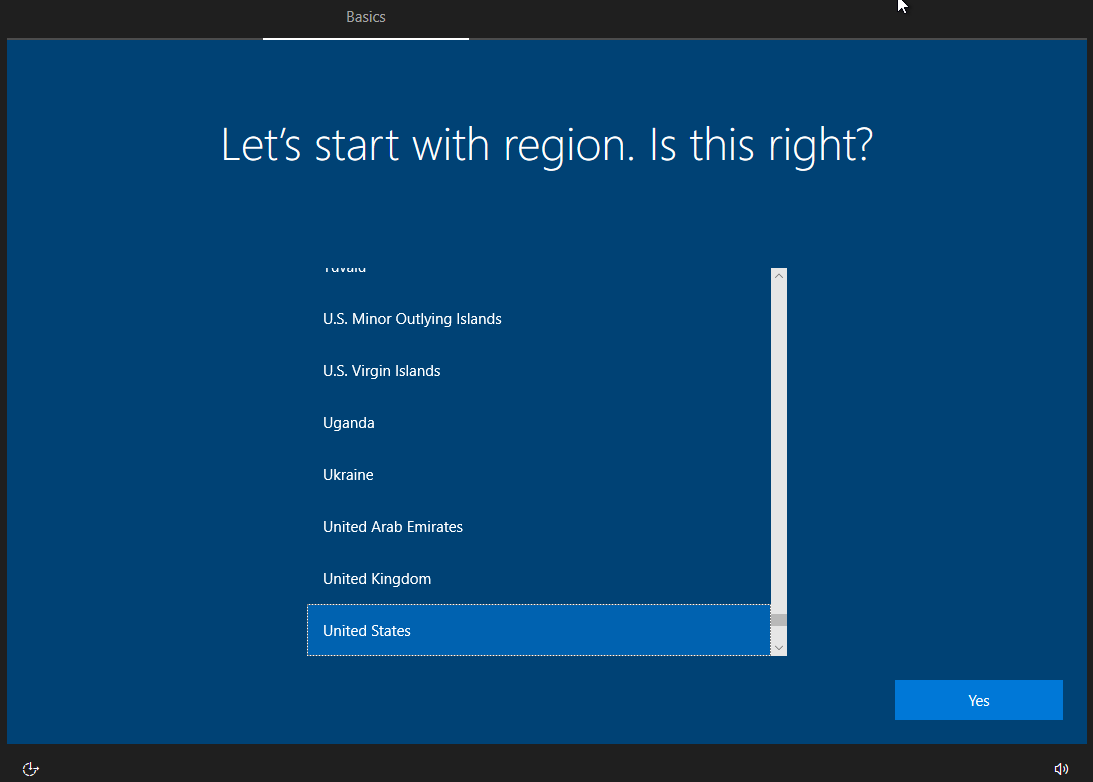
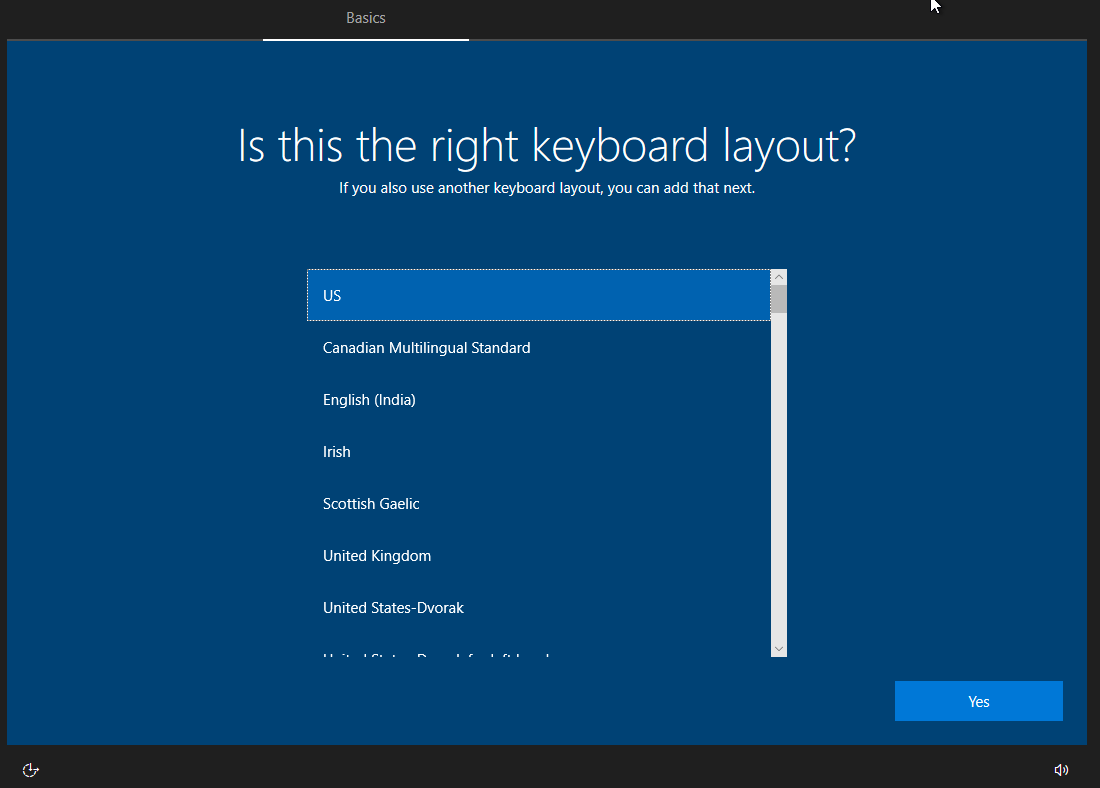
Choose your preferred region and keyboard layout.
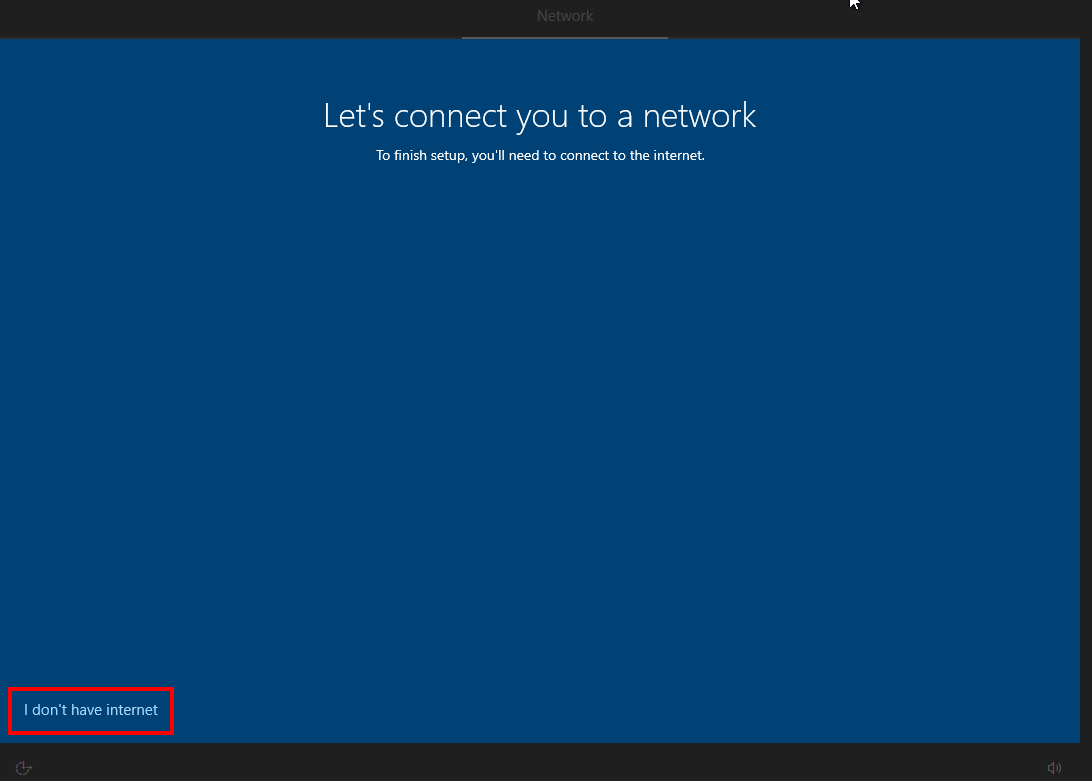
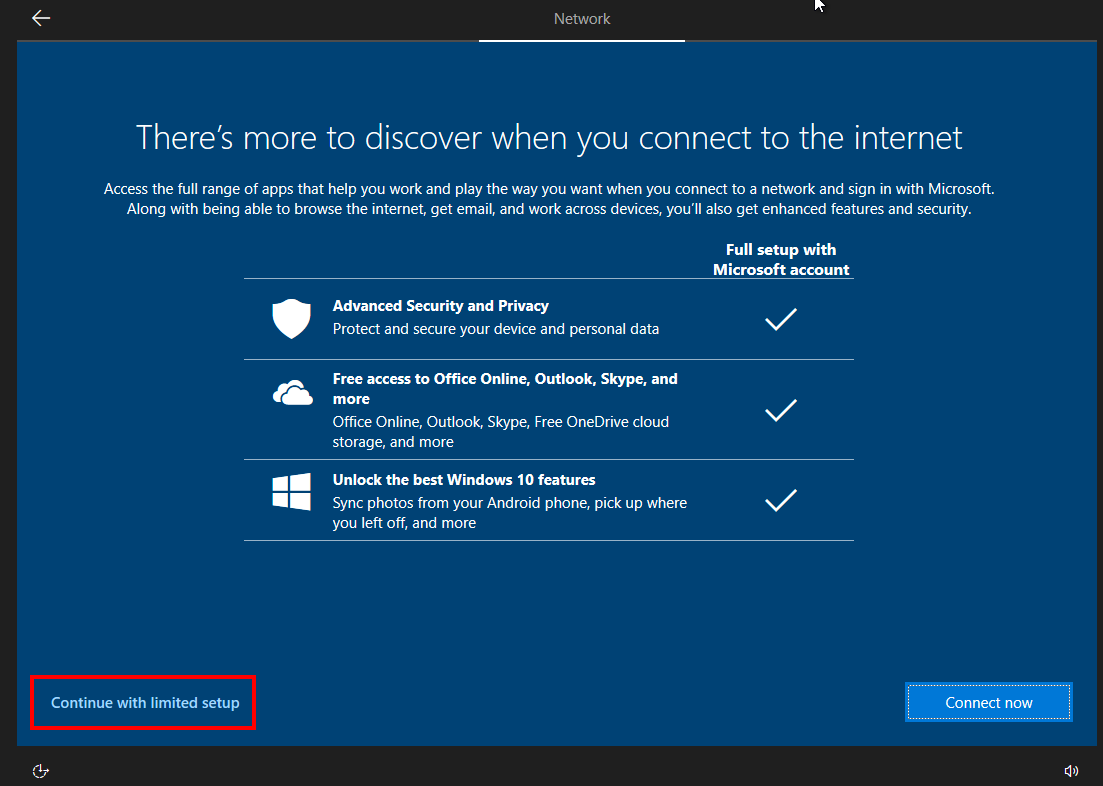
Select I don’t have internet and Continue with limited setup.
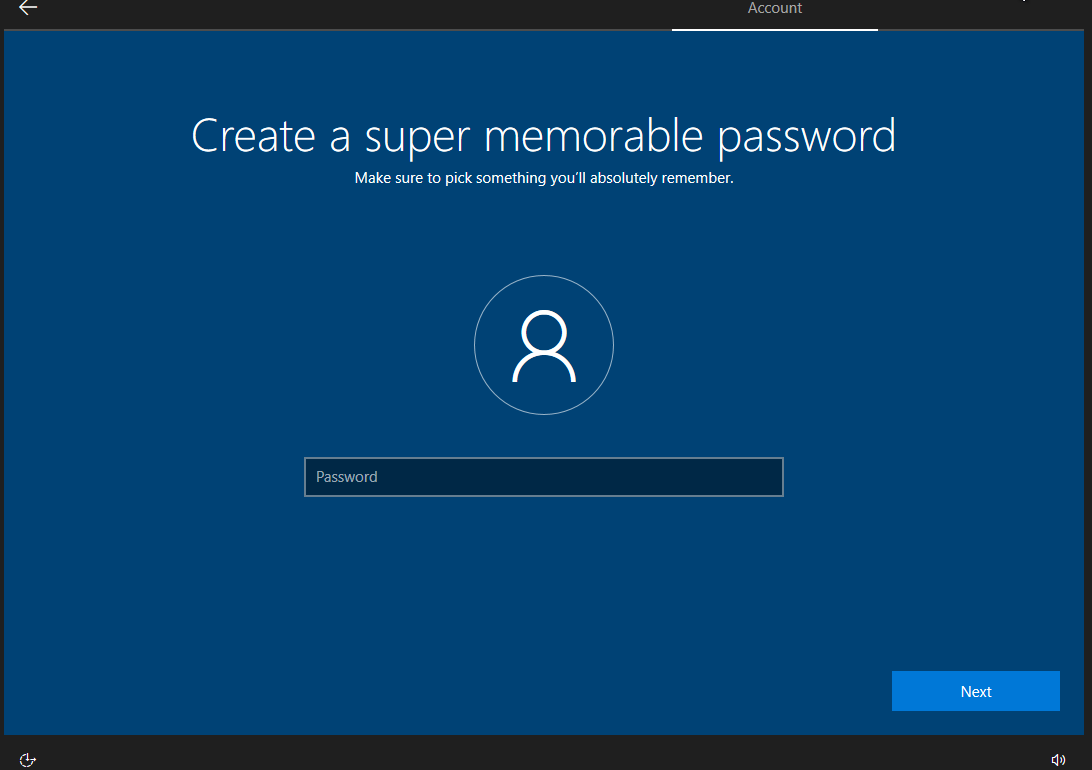
Establish a very generic name for your user and click Next. Leave the password empty and click Next.

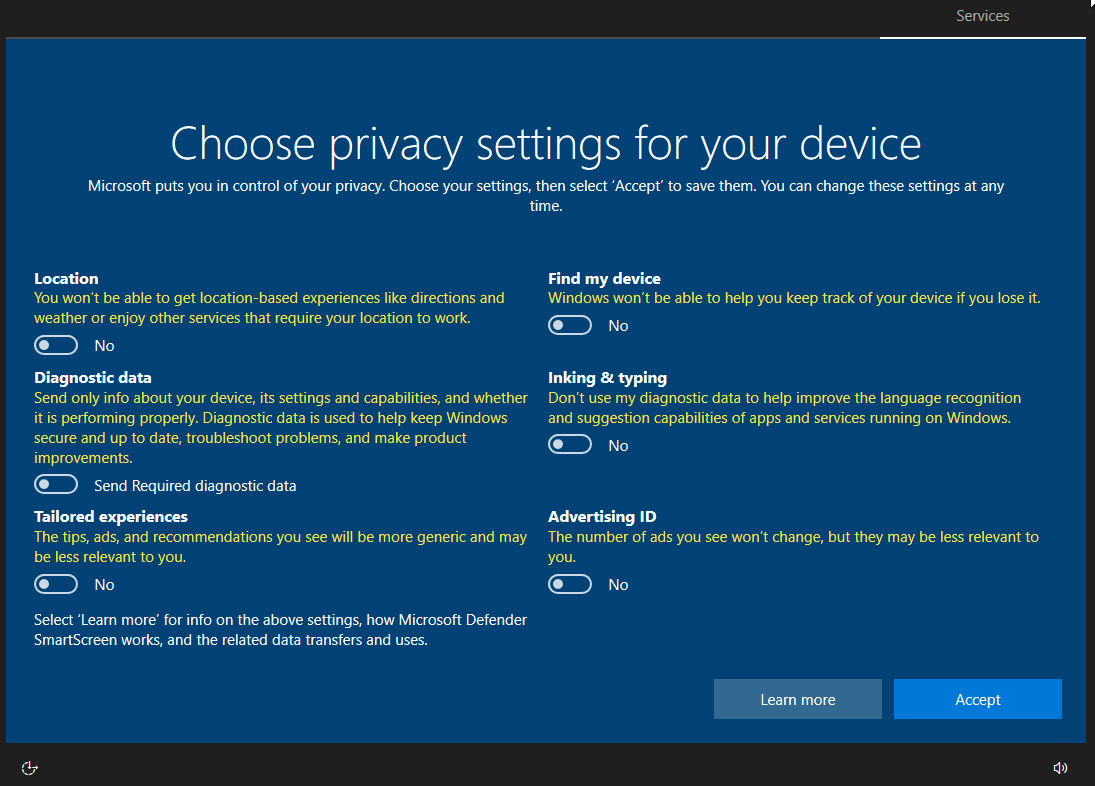
Disable all data-collecting services.
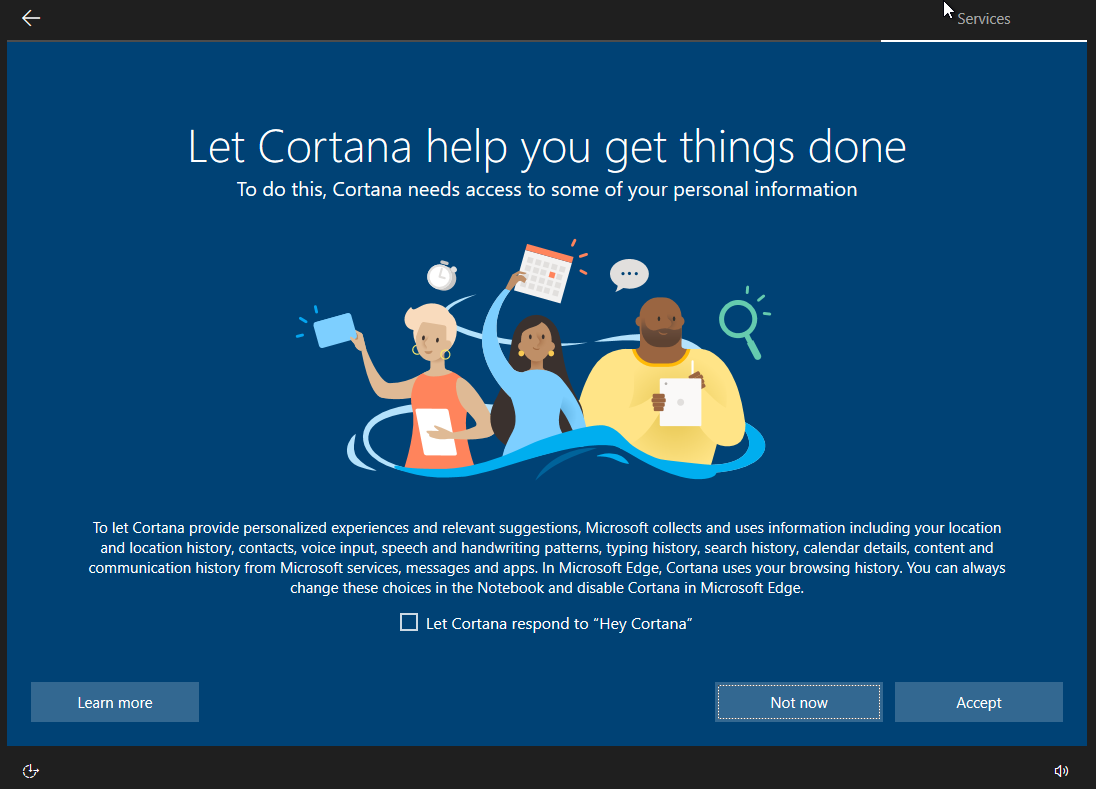
Select Not now for Cortana and wait for Windows to process further installation until it reboots your VM.

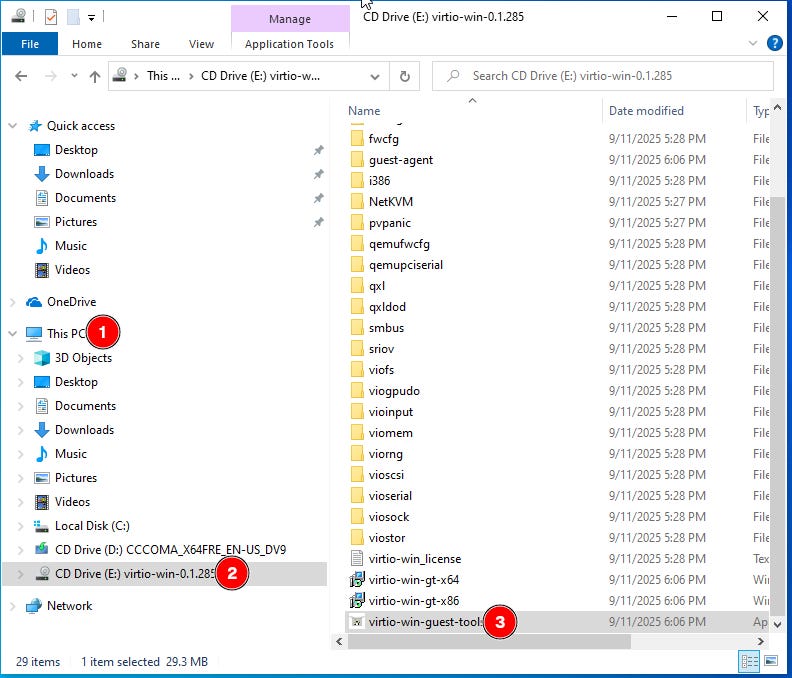
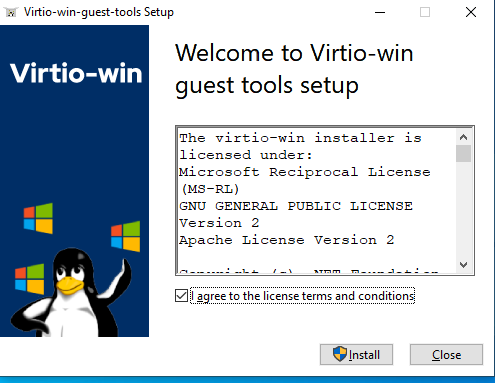
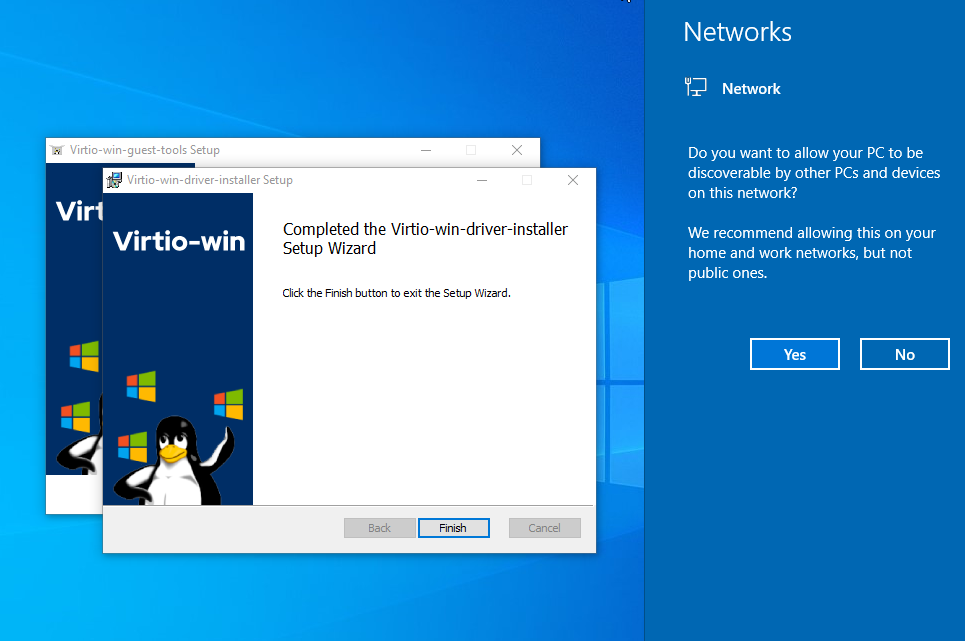
Open File Explorer, expand This PC, select CD Drive … virtio-win … and execute virtio-win-guest-tools and install it and agree with the terms.


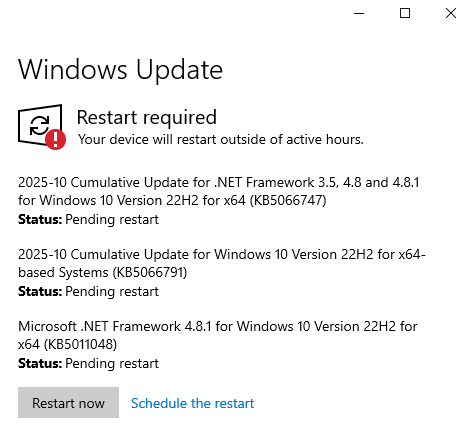
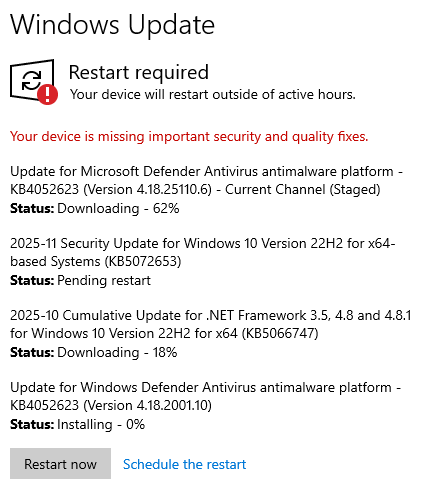
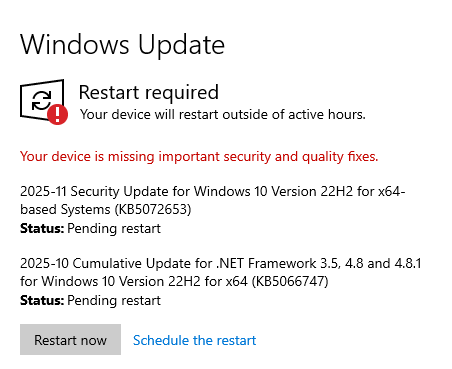
Search Windows Updates and click Check for updates. Wait for the updates and Install now and Restart now.

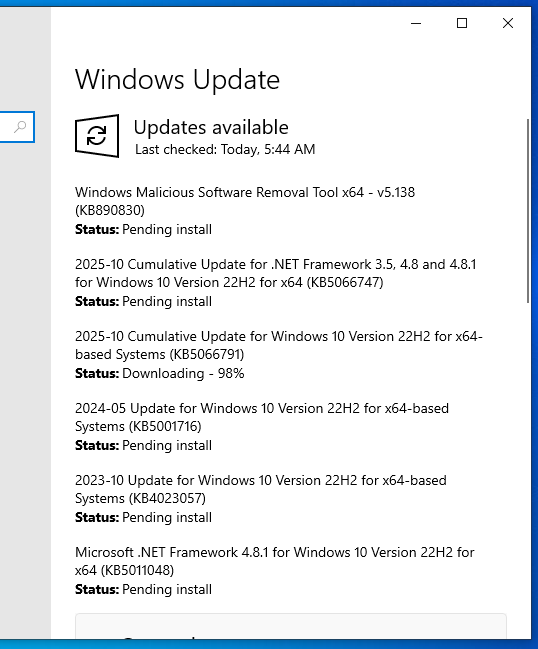
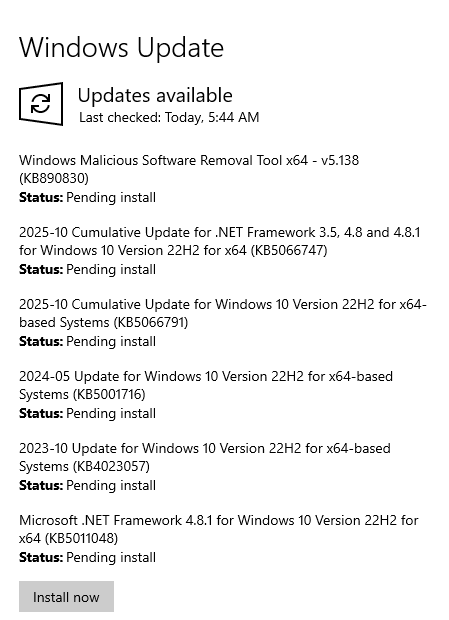
Repeat Checking for updates until it can no longer find additional updates.

Launch Microsoft Edge Browser and select Continue without signing in.

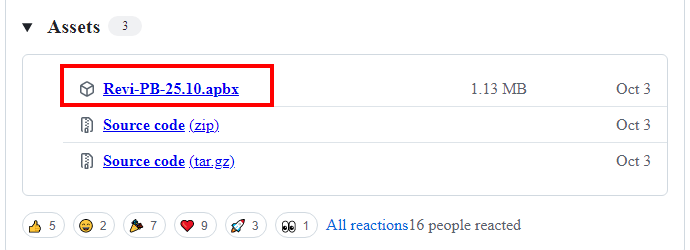
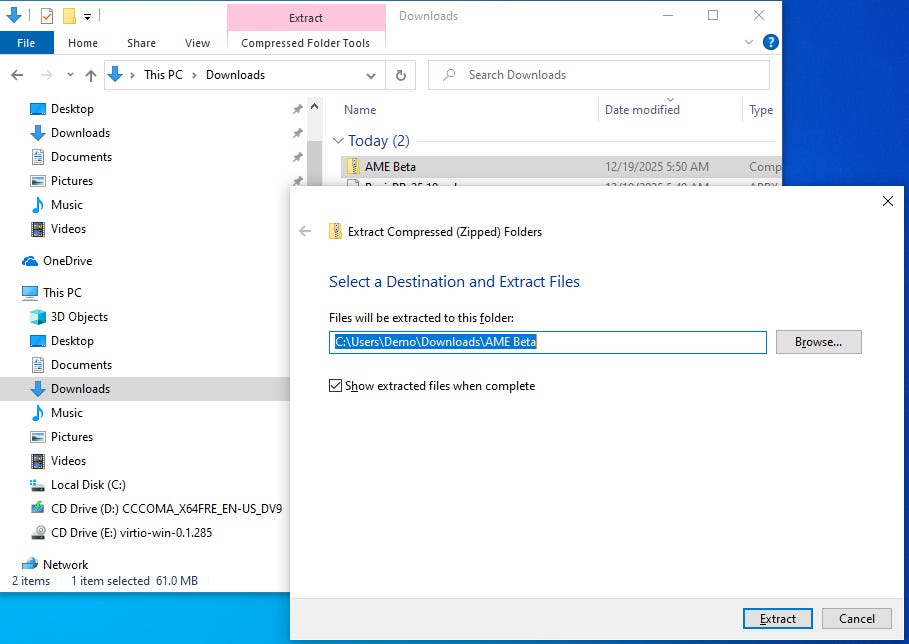
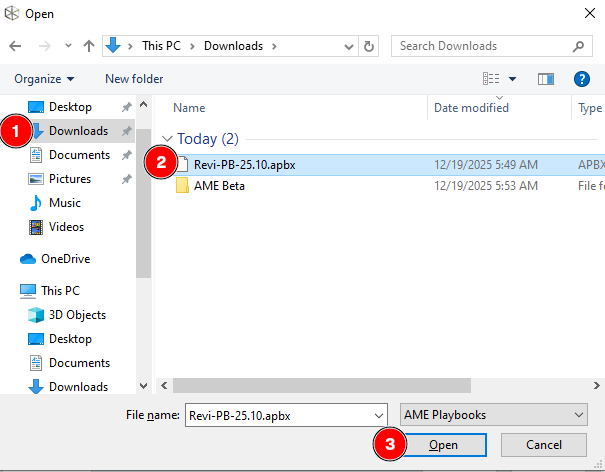
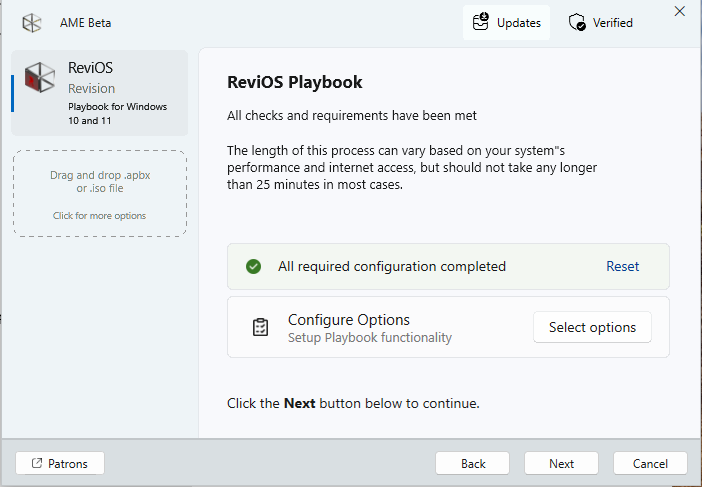
Go to the GitHub releases of an AME Playbook and download the most recent .apbx file.
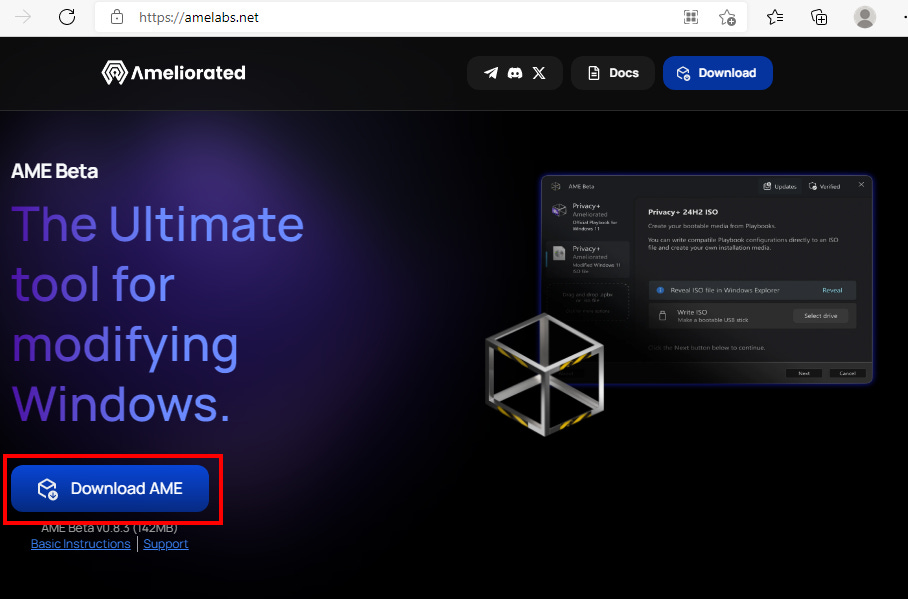
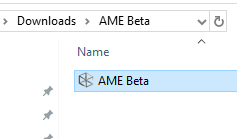
Go to the Ameliorated web site and Download AME and extract its content.
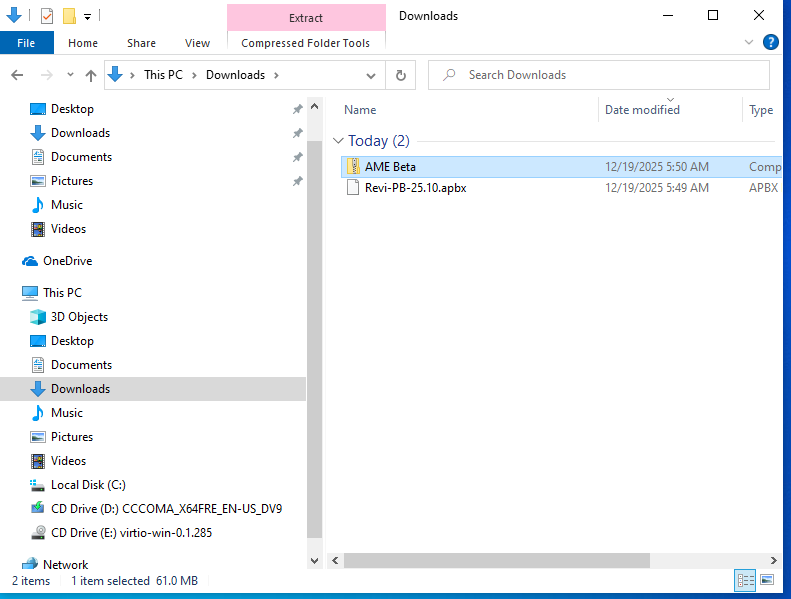
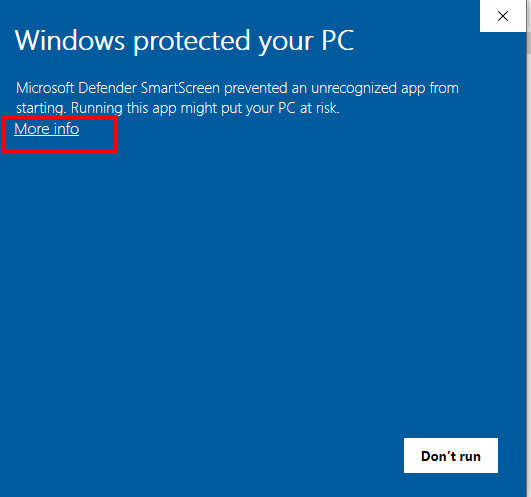
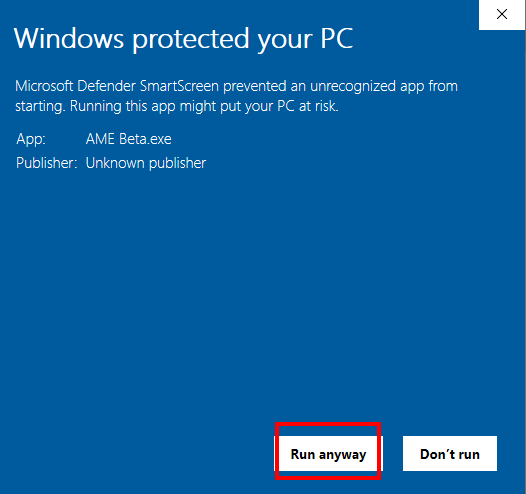
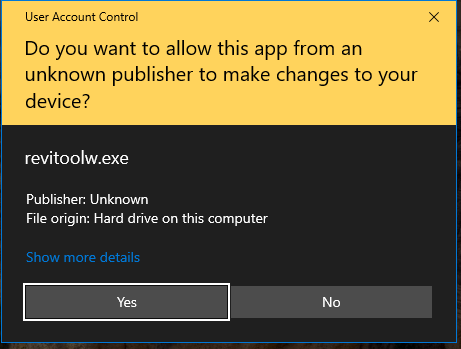
Execute the extracted executable called AME Beta. Click More info and Run anyway and Yes.

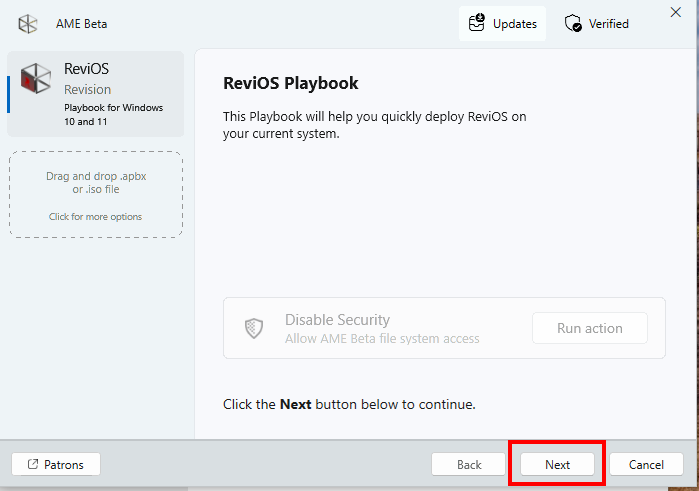
On AME Beta, click Use Existing and browse to the directory where the .apbx playbook file was stored and Open it.

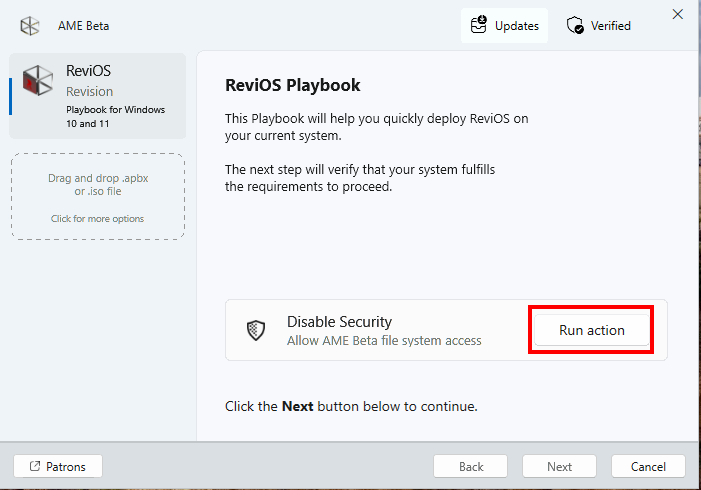
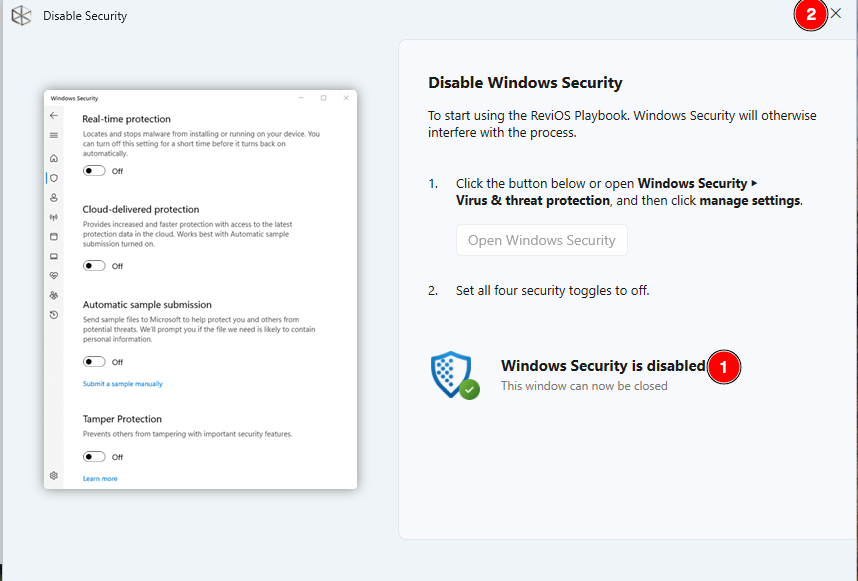
Once the playbook is loaded, disable security by clicking Run action > Open Windows Security and switch all protections off.
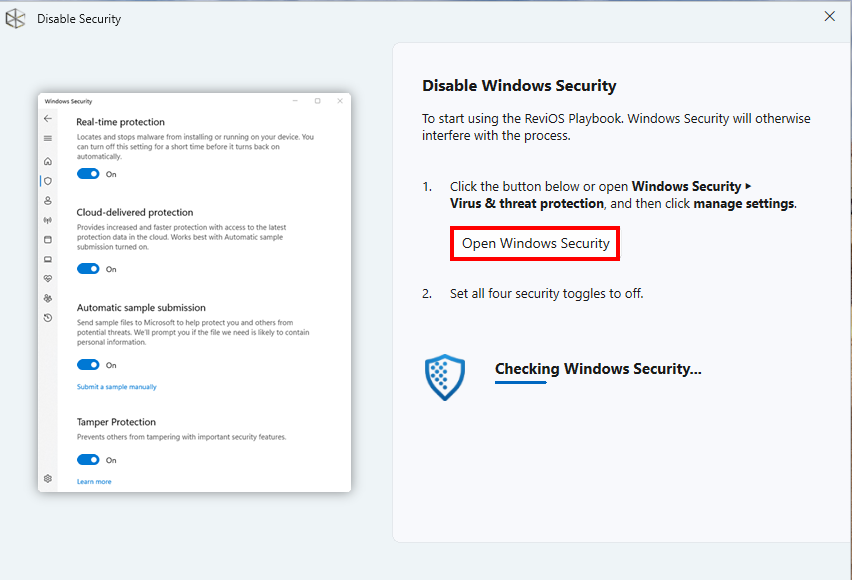

Thereafter, you will see Windows Security is disabled, so click the close (x) button.
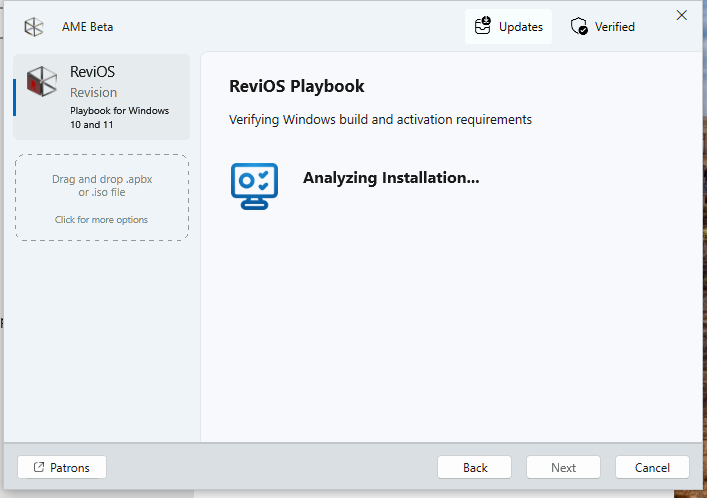
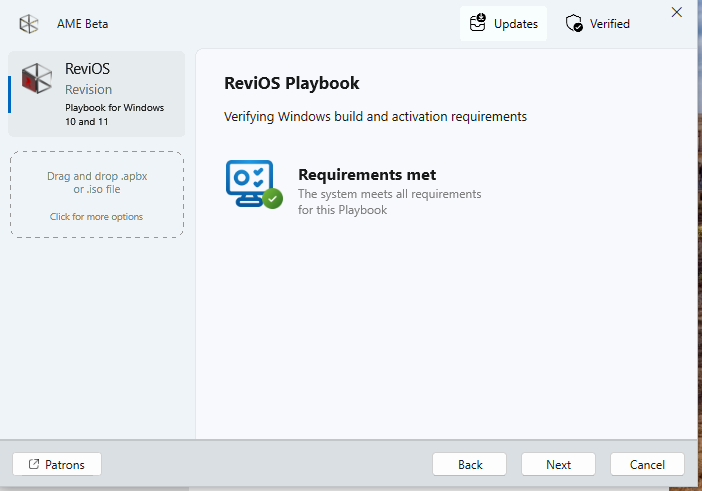
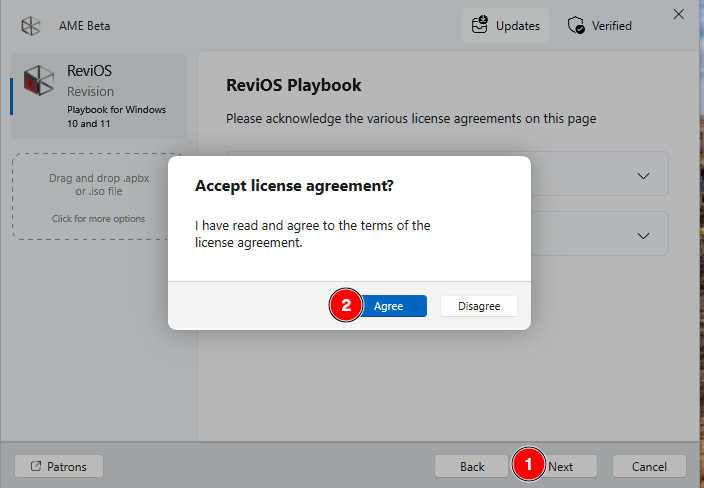
On the main AME page, click Next > Next > Next and accept the License Agreement.
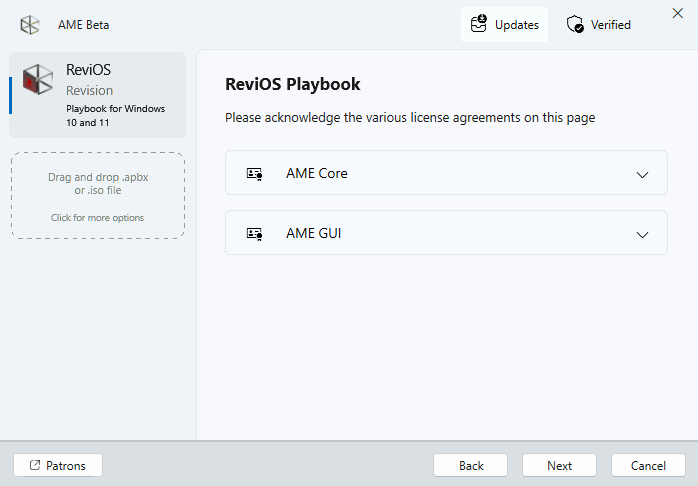
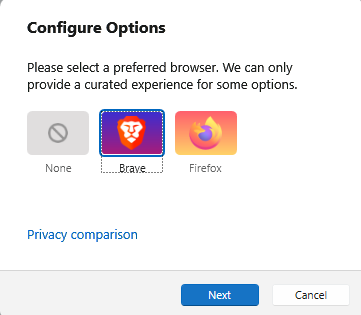
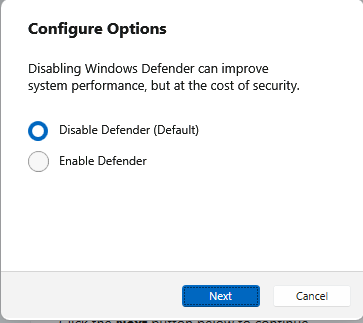
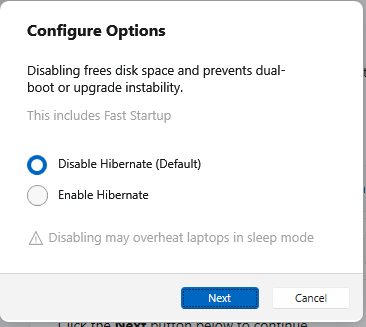
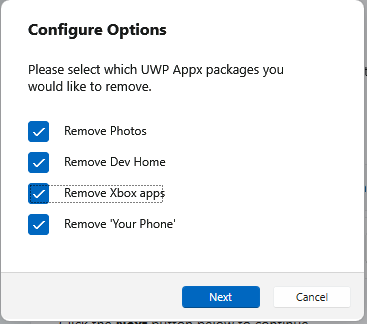
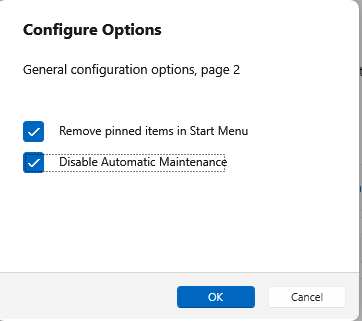
On the main AME page, click Select options and select the component that you want to remain or not.


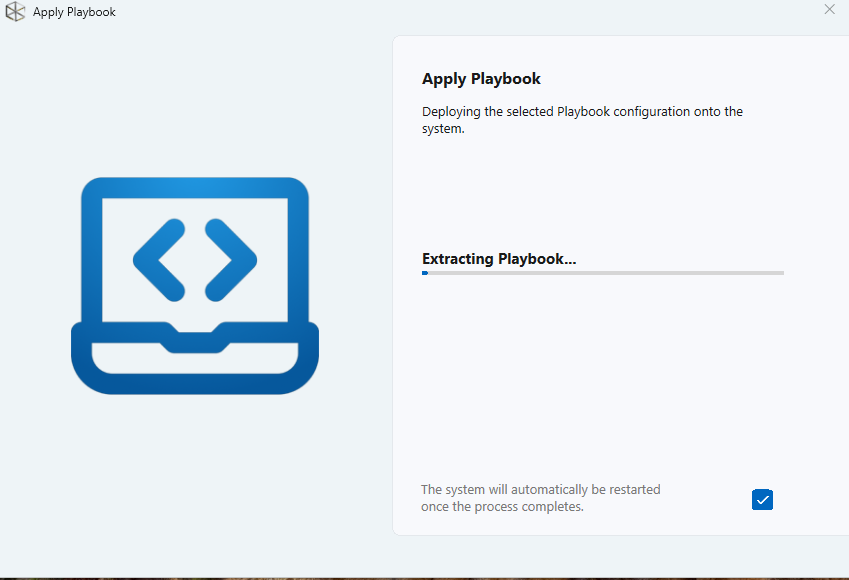
On the main AME window, click Next and wait for it to process the playbook until it restarts your VM.
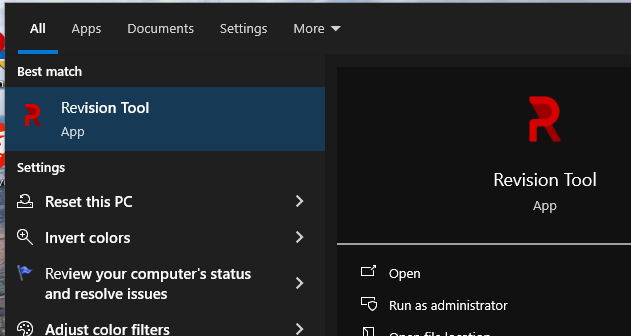
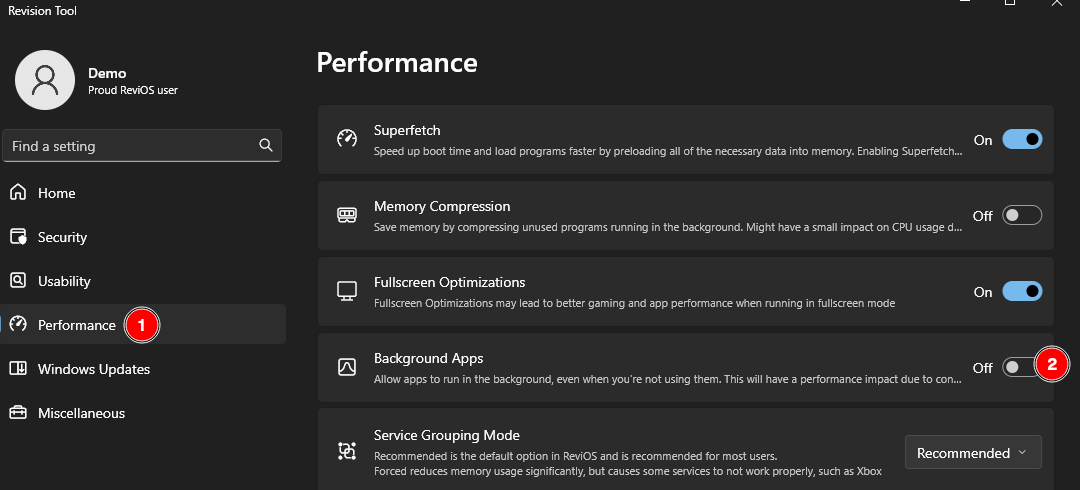
Once returned to the de-bloated Windows workspace, execute Revision Tool to disable more services such as User Account Control (UAC), Spectre & Meltdown Mitigation, Windows Notifications, Background Apps.


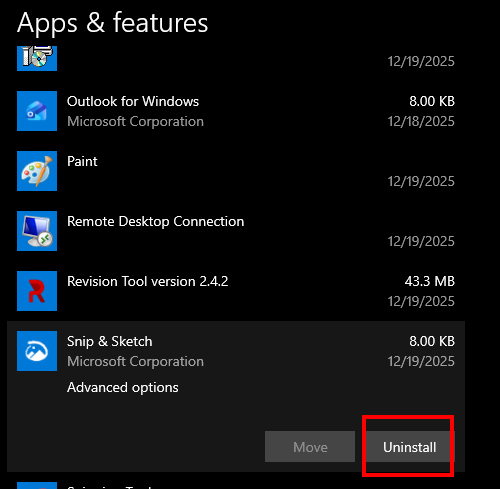
Go to Add or remove programs and remove additional unnecessary software that you can find.


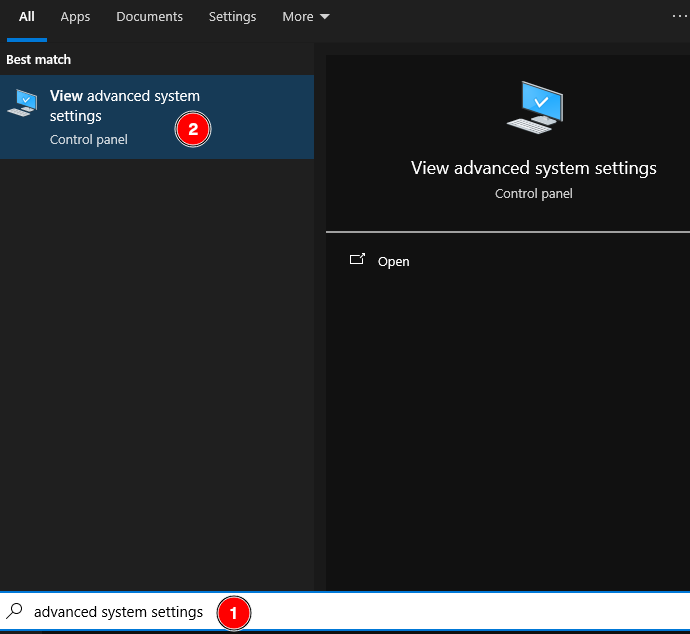
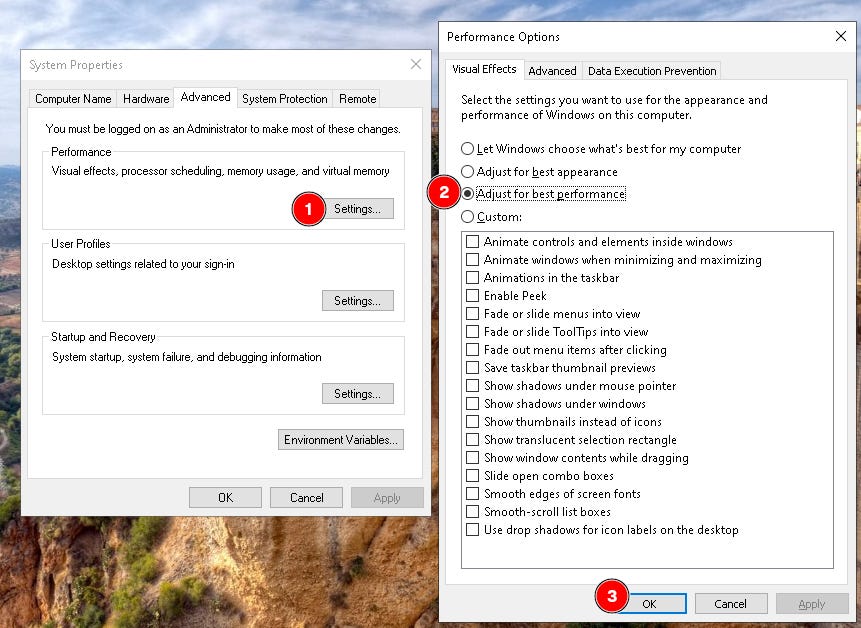
Go to View advanced system settings > Performance > Settings… and select Adjust for best performance, click OK.
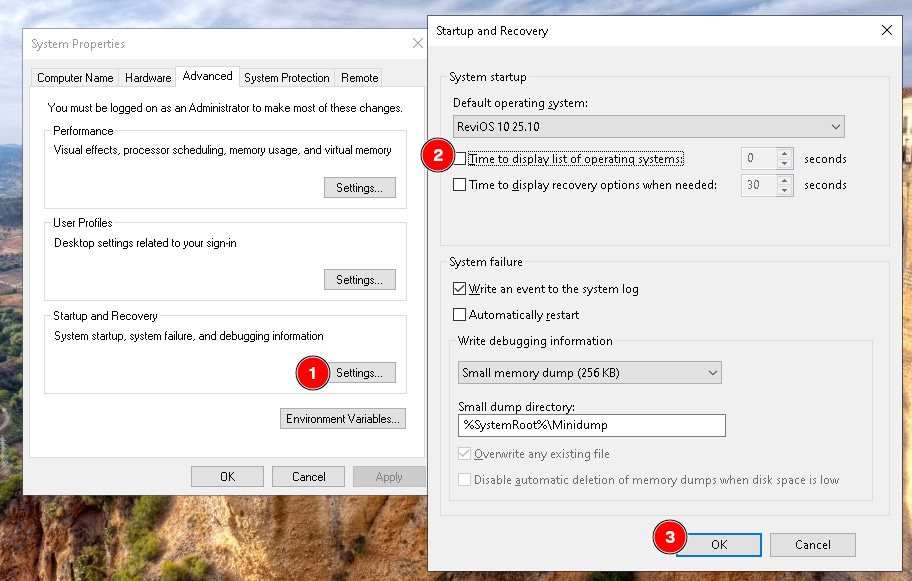
On the same System Properties > Startup and Recovery > Settings…, uncheck Time to display list of operating systems. Click OK.
Press Alt+F4 and restart and make your personal adjustments to Windows.

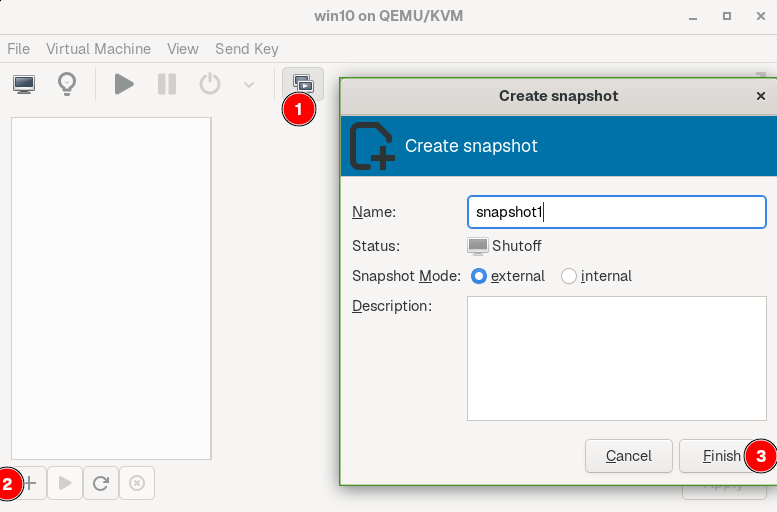
On the main virt-manager window, open the Windows VM, click on the Manage VM snapshots button, click the Create new snapshot button, Finish.

Create multiple snapshots. Snapshots are point-in-time states of your VM - ideal for experimentation and testing and such.

